



Draw the Daylight Zone Before You Add Sensors to Warehouse High Bays
A skylight does not turn the whole warehouse into one daylight zone. It creates a moving patch of useful light that can cross one fixture row, miss the next, and change with clouds, dirt, rack height, and seasonal sun angles.
Before buying photocells, put the daylight openings, work surfaces, obstructions, fixture locations, and expected control response on one drawing. The goal is a control package that a contractor can wire and a facility team can test.
Collect five inputs before drawing a daylight zone
A ceiling plan with a few skylight rectangles is not enough. Add the facts that explain where daylight can reach and where electric light still has work to do.
- Opening geometry: location, size, orientation, curb, well, diffuser, shade, and roof structure.
- Fixture and workplane elevations: actual luminaire height and the surfaces where people read, drive, pack, or inspect.
- Persistent obstructions: racks, material, ducts, cranes, mezzanines, and structure. Connect this plan to the warehouse lighting obstruction map.
- Fixture rows and switching boundaries: fixture ID, relay group, control pair or wireless zone, and sensor.
- Operating pattern: occupied hours, partial shifts, critical tasks, and areas that cannot tolerate a poorly timed reduction.
Draw zones that follow daylight—not just fixture rows
Begin with three overlays: the architectural daylight area, useful daylight at the task, and controllable fixture groups.

Architectural daylight area
Mark the code-defined or design-defined area around each opening. Published diagrams are planning references, not universal dimensions.
Useful daylight at the task
A bright roof patch does not prove adequate light on a rack label, packing table, or travel path. Tall racks can create a bright upper zone and a screened lower zone under the same skylight.
Controllable fixture groups
If one group spans a bright skylight band and a dark rack aisle, splitting it is often more predictable than searching for one sensor setting that satisfies both. Circle each mismatch and assign a decision.
Give every fixture one control job
Use a fixture-to-control matrix. It prevents “sensor-ready” from replacing a real sequence of operation.
| Condition | Control job | Record | Split when |
|---|---|---|---|
| Core skylight band | Reduce output with verified daylight | Fixture/sensor IDs, task points, setpoint | Opening, orientation, or schedule differs |
| Screened pocket | Protect a route or task | Obstruction height, target surface, fixture IDs | Sensor sees daylight the task cannot use |
| Non-daylight interior | Follow occupancy, schedule, or manual control | Control source and occupied state | Fixture follows a sensor outside its area |
A 0–10V high bay is one component, not the control system
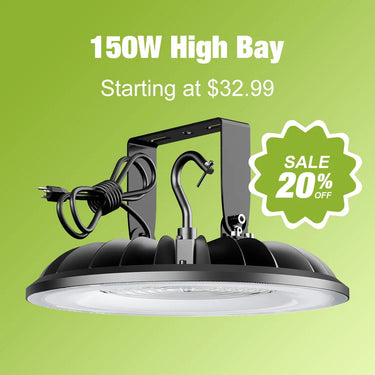
The current YXL HBUFO product page lists 0–10V dimming across displayed selectable-output variants. That makes the family a candidate for controls review. It does not confirm a particular photocell, sensor, controller, or sequence.
Before ordering, get written confirmation for the exact fixture and control part numbers: driver protocol; minimum stable dim level; full-off behavior; sensor compatibility; device load limits; power-failure behavior; occupancy/daylight priority; wiring diagram; and current manuals.
Test the system in three real daylight conditions
A zone can look convincing on a screen and behave badly in the building. Test the same fixture group under low daylight, strong daylight, and after dark.

Low daylight
Confirm the approved electric-light condition. Record task readings, output state, sensor reading if available, and screened pockets.
Strong daylight
Verify that intended fixtures reduce output without sacrificing protected tasks. Walk the zone edge and look for brightness steps, glare, dark rack faces, or fixtures dimming outside the area.
After dark
Confirm that daylight control releases correctly and the system returns to approved occupied behavior. Test occupancy, schedules, manual override, and project-assigned emergency controls.
If output hunts during passing clouds, document it and have the controls professional review setpoint, delay, fade behavior, sensor view, and zone boundary.
Turn the marked plan into a usable handoff
The closeout package should include the ceiling plan, zone boundaries, fixture and sensor IDs, sequence, submittals, settings, acceptance readings, override instructions, and owner of future changes.
For a project-specific arrangement, send the dimensioned plan, skylights, mounting height, rack/task layout, fixture candidates, controls, voltage, schedule, and ceiling photos through YXL’s lighting layout service.
Sample Image Gallery


